One difficult aspect of our property was the fact that the house walls formed the rear boundary; our neighbour’s croft wrapped around two sides of the house and, indeed, their woodshed was attached to the side wall of our house. Access for any buildings maintenance required permission. Whilst we had a very good and amicable relationship with our immediate neighbours, we were aware that there was no guarantee that any future owners of their land would be as easy to get on with. So, when the elderly neighbours decided to move to a retirement bungalow, we took the opportunity of purchasing their house and land in order to realign the boundaries and greatly increase our back garden area.
It was at this point that my hillside gardening challenge really began.
The altitude of the front boundary wall is 288 metres (above sea level), from which the ground slopes upwards across 52 metres to the back boundary wall, altitude 300 metres (12 metres difference); so a gradient of almost 1 in 4. This, however, is somewhat misleading because, over those distances there are some relatively flat areas and some vertical edges and steps. This hilliest part of the garden, though, is at least 1 in 4, if not a good deal steeper in places.
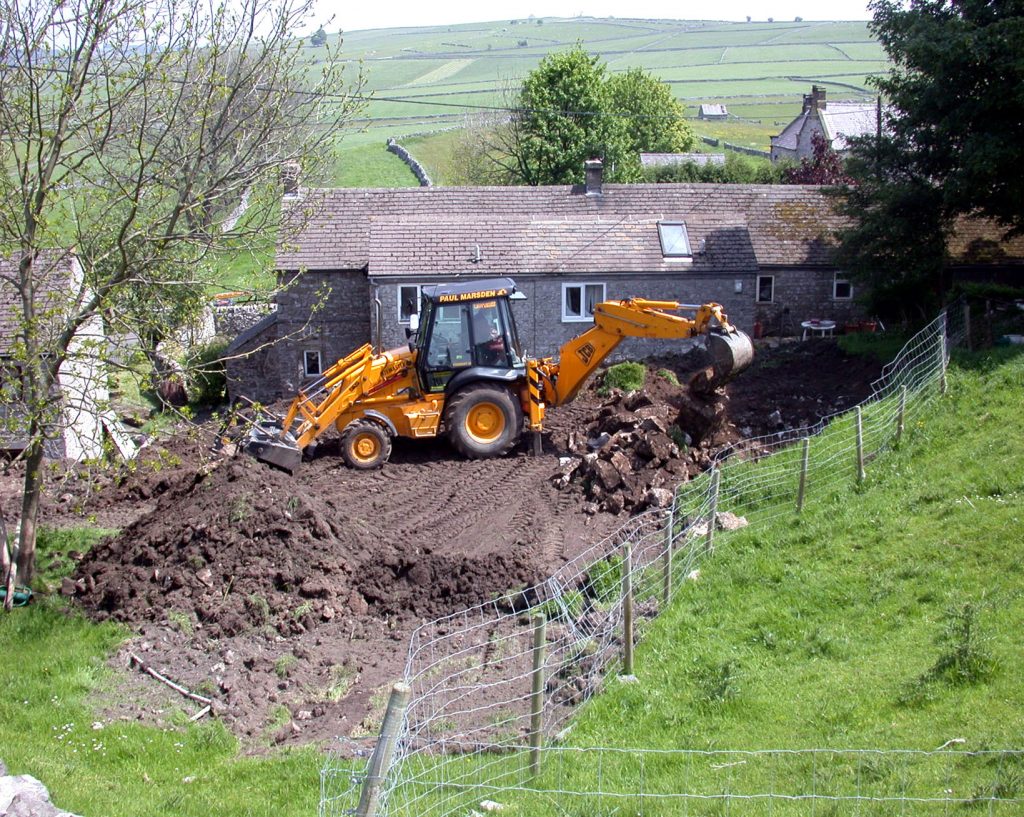
The first thing we needed to do, on acquiring the next-door property, was to dig away the ground from the back corner of the house, where it was causing problems of rising damp; this would require some careful excavation with a digger, nibbling away at the rock in order to leave a healthy distance between the old house and the bank into which it had been built (without the advantage of modern damp-proof membranes). Not until this work was done and the new boundary walls were installed could we put the house on the market with a view to repaying the hefty bank loan.
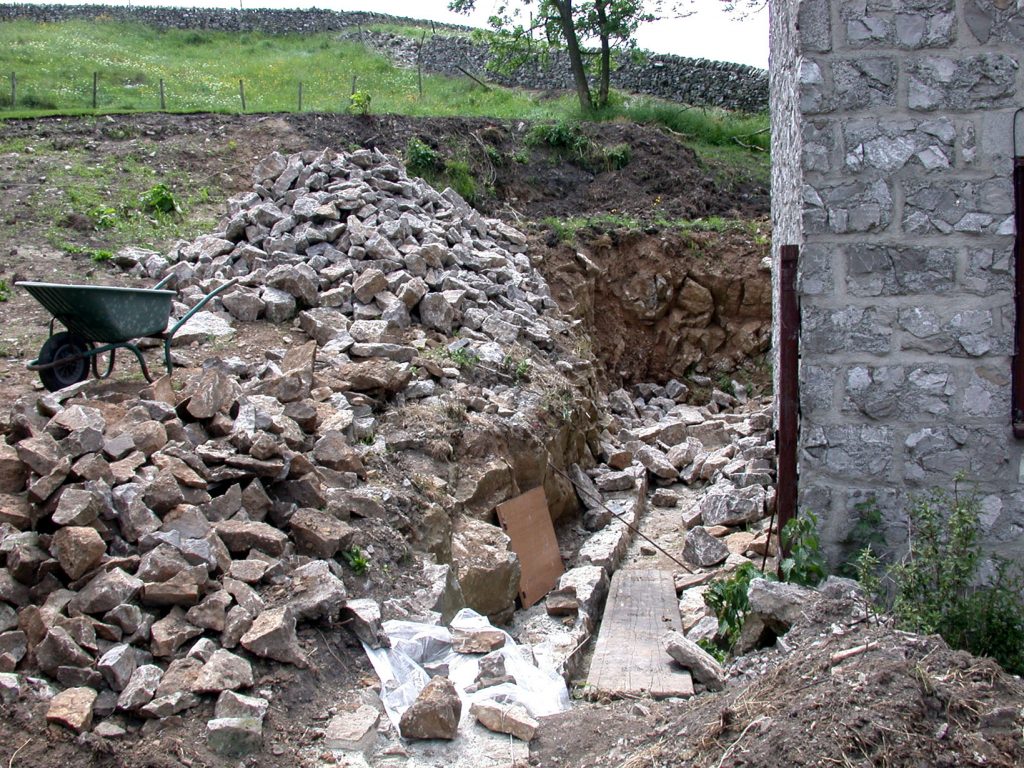

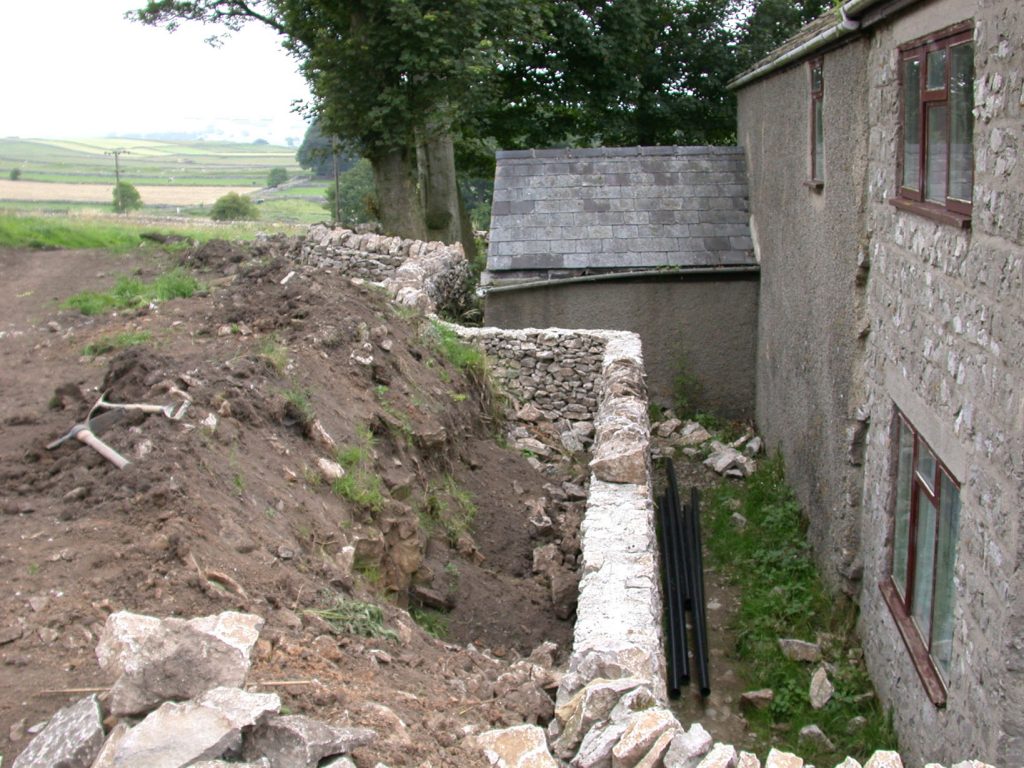
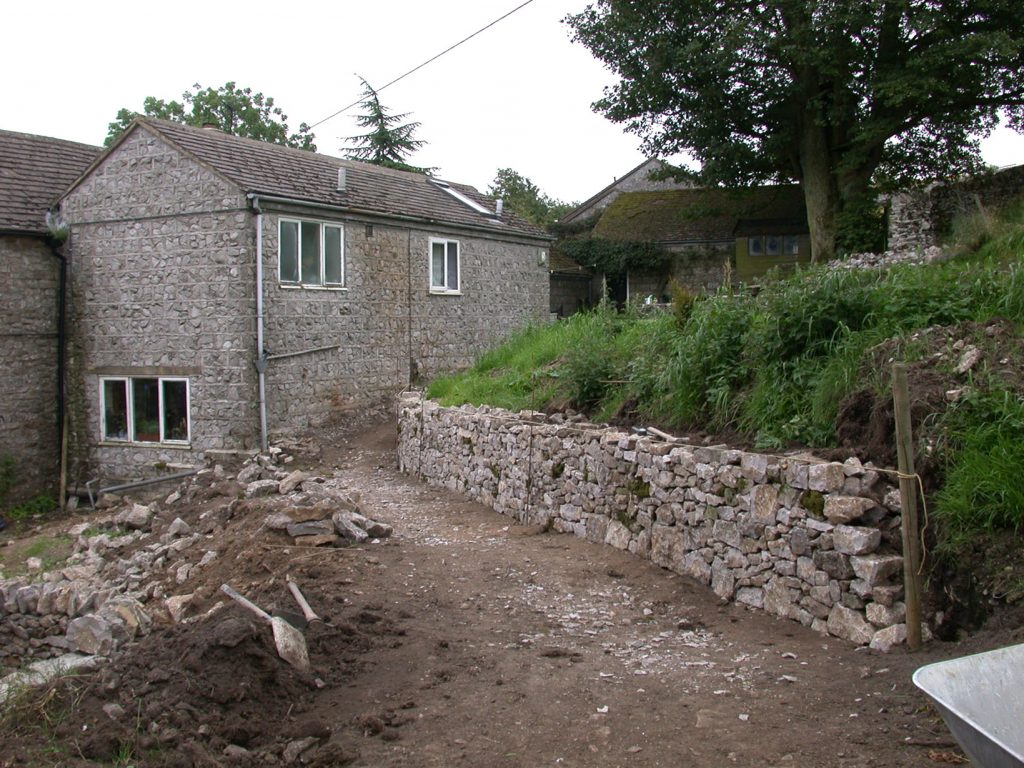
Our new boundary wall is seen in construction, halted during excavation work. The corner our house, on the right, formed the original boundary between the properties; the stone shed attached to our house belonged to next-door and the small Philadelphus shrub was in next-door’s garden (I subsequently managed to dig the Philadelphus out because it is a slightly unusual, dainty form, and replanted it in the back garden).
The Wheelbarrow indicates where one of several ramshackle sheds had been situated.
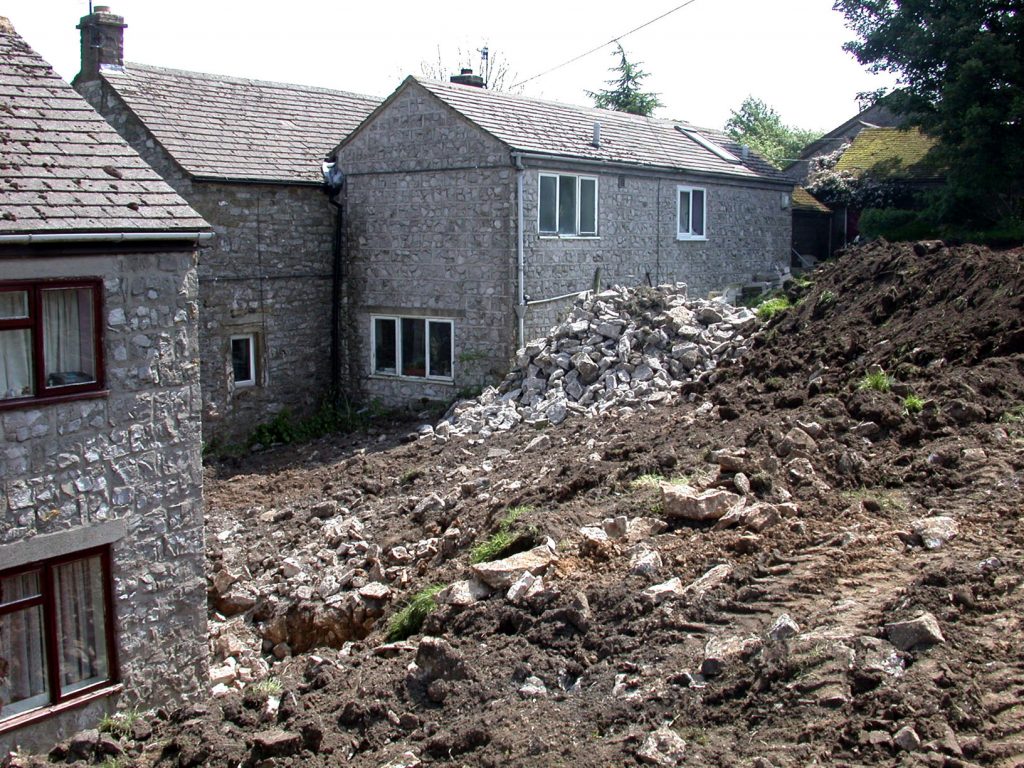
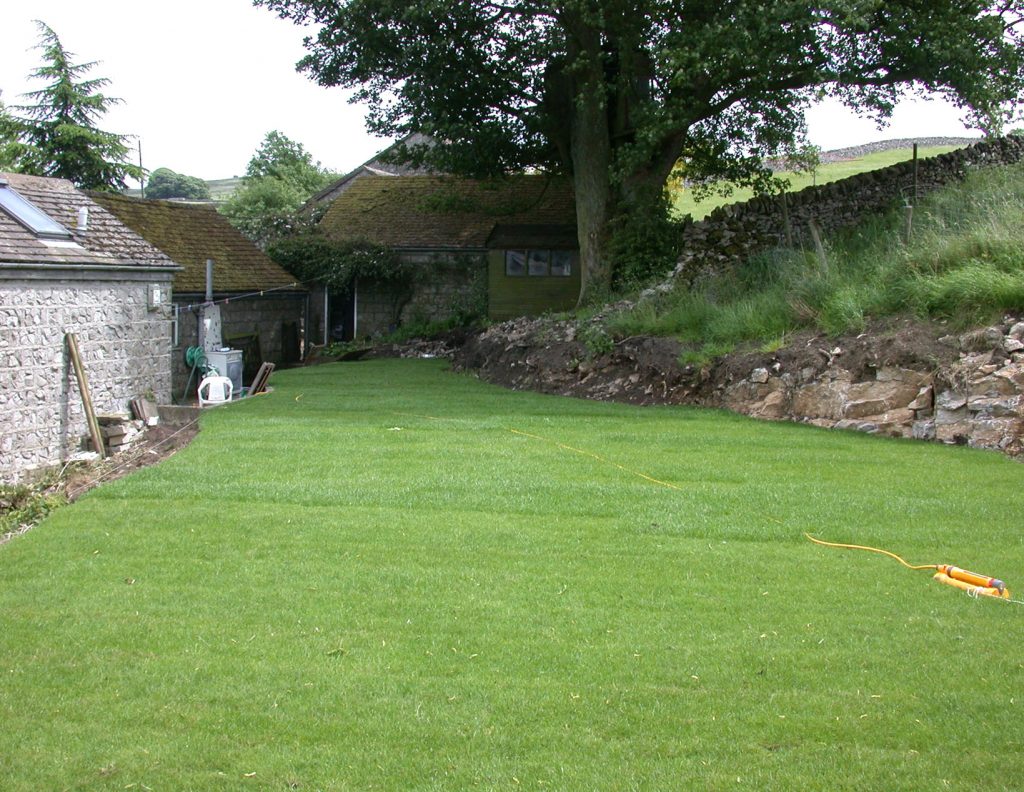
Whilst we had the digger on site, it made sense to use it to level a section of the steep bank behind our house, in order to make a lawn and seating area. At this point, it didn’t look like a very promising prospective garden.
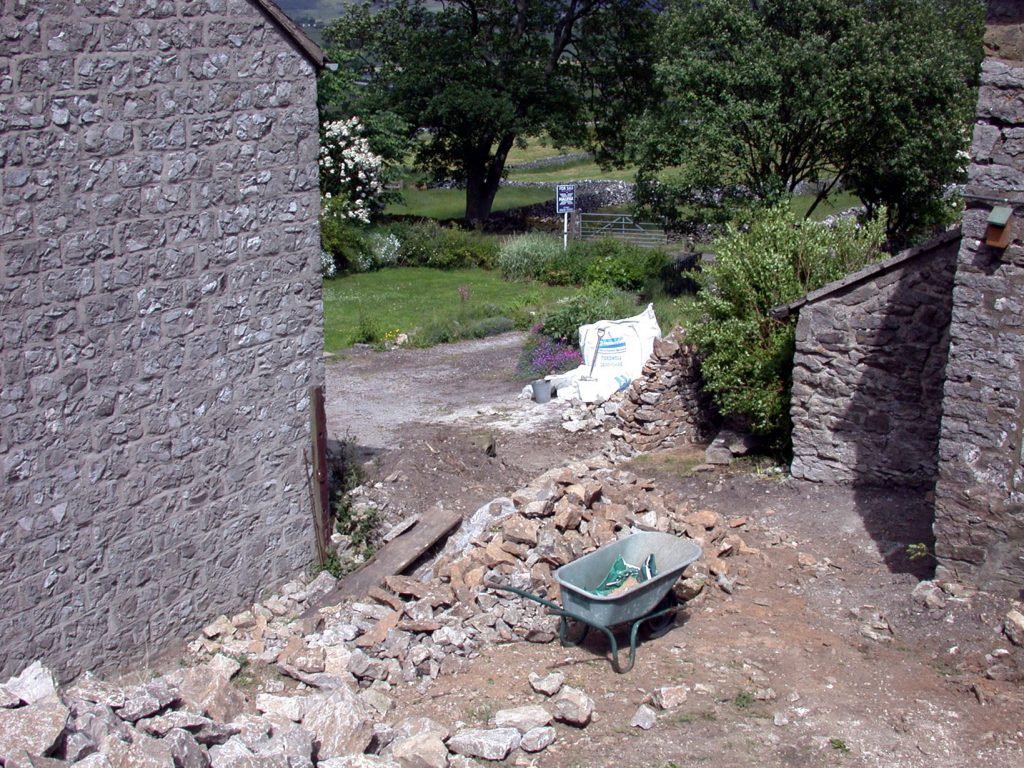
This picture gives an indication of the gradient of the lower part of the hillside. The excavated limestone was harvested and used for the building of strong retaining walls behind both houses.
The visible temporary fencing had been used to contain a couple of sheep we had reared from orphaned lambs.
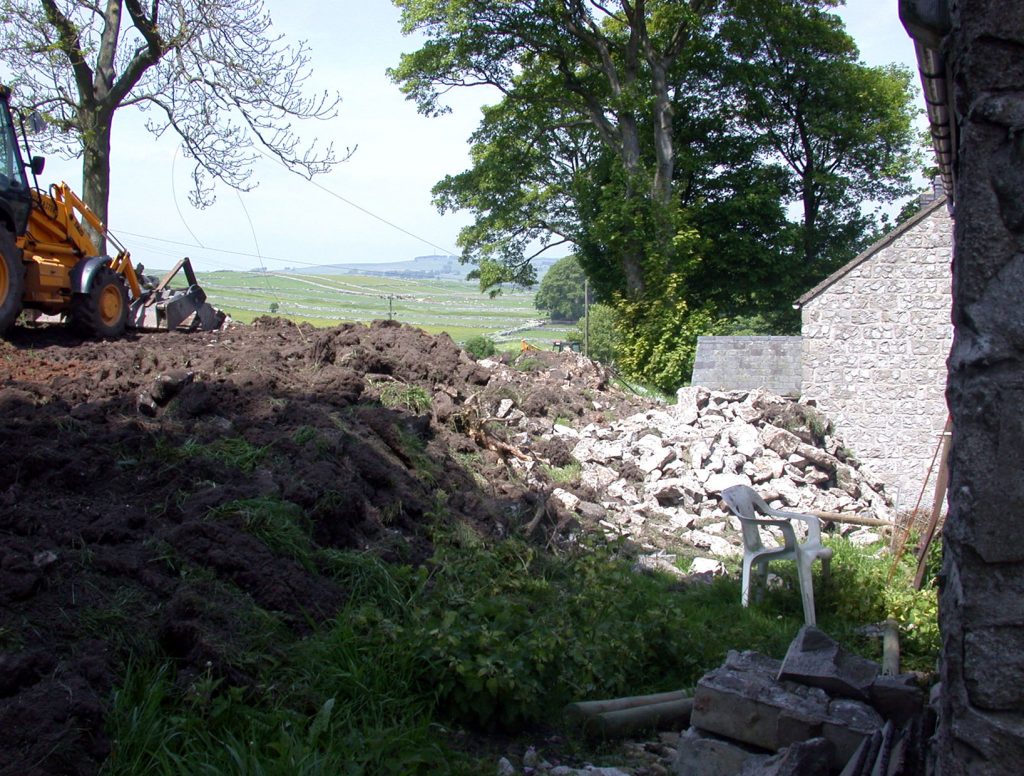
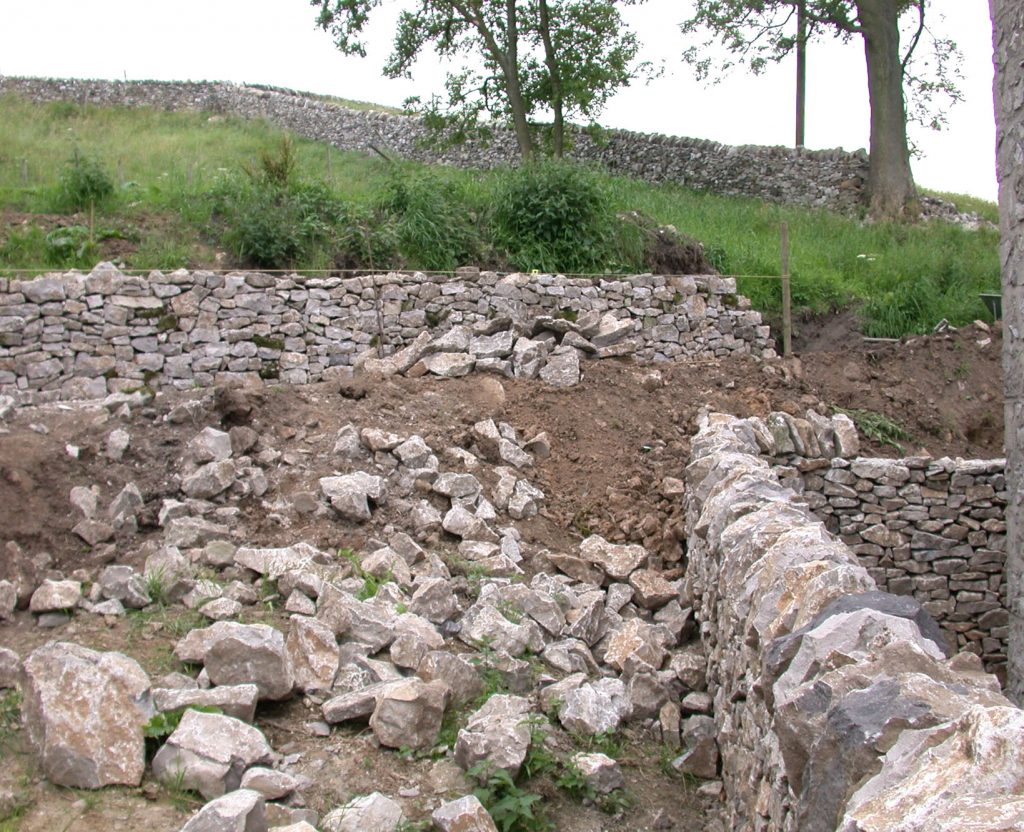
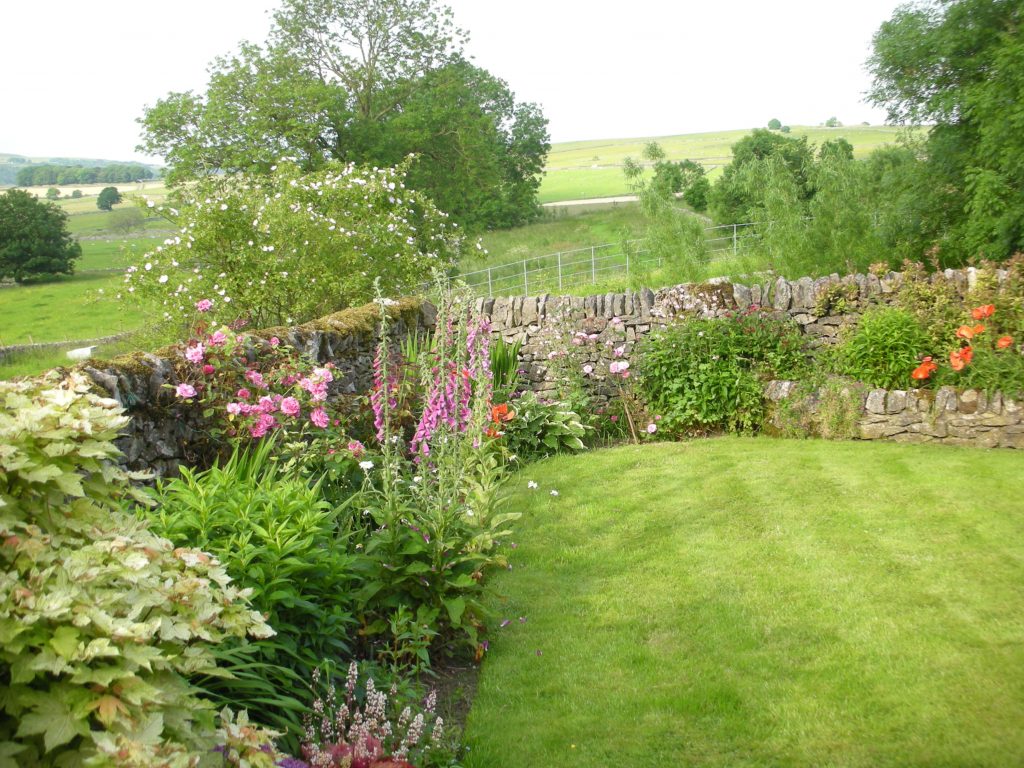
It was necessary, in order to give access for a digger, to demolish a section of the dry stone wall that was the boundary between our newly enlarged land and the grazing field on the other side. It was only once the dry stone wall came down that we realised what a magnificent view lay beyond. If you imagine, in the above photo, a drystone wall high enough to completely hide the small extension behind the house next door, crossing the diagonal incline up to the tree trunk visible behind the digger, then you will get some idea of our “surprise view” once the wall came down. We decided we must do all we could to secure that view, so we contacted the landowner and offered to rent the field at twice the normal farmer’s rate on the understanding that, should they ever decide to sell it, we would get first refusal. We needed to be certain that no buildings were ever going to be erected to obscure that view.
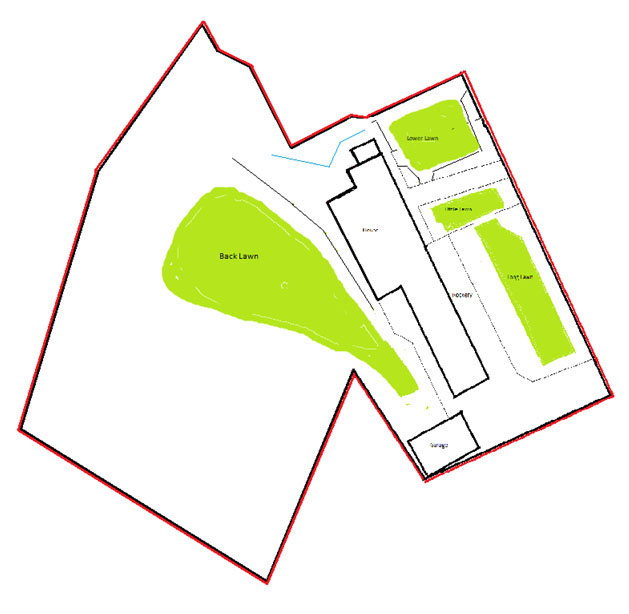
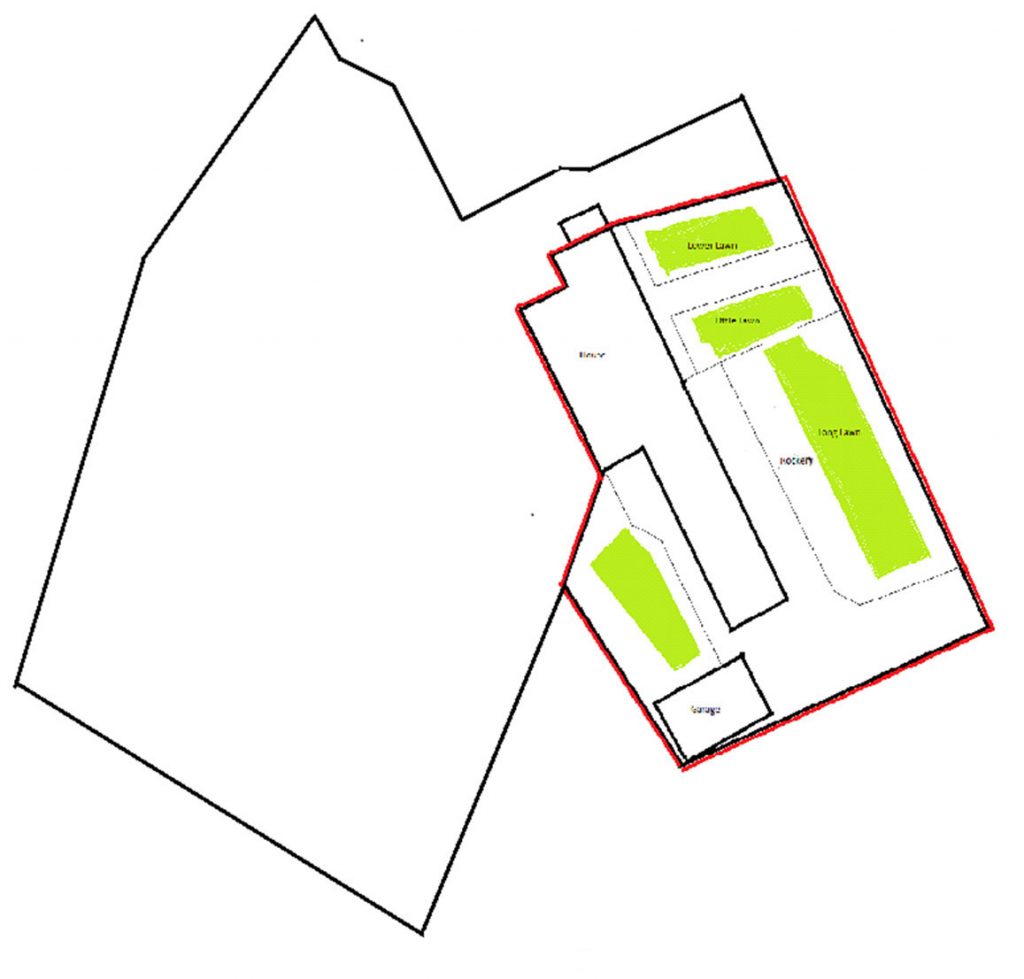
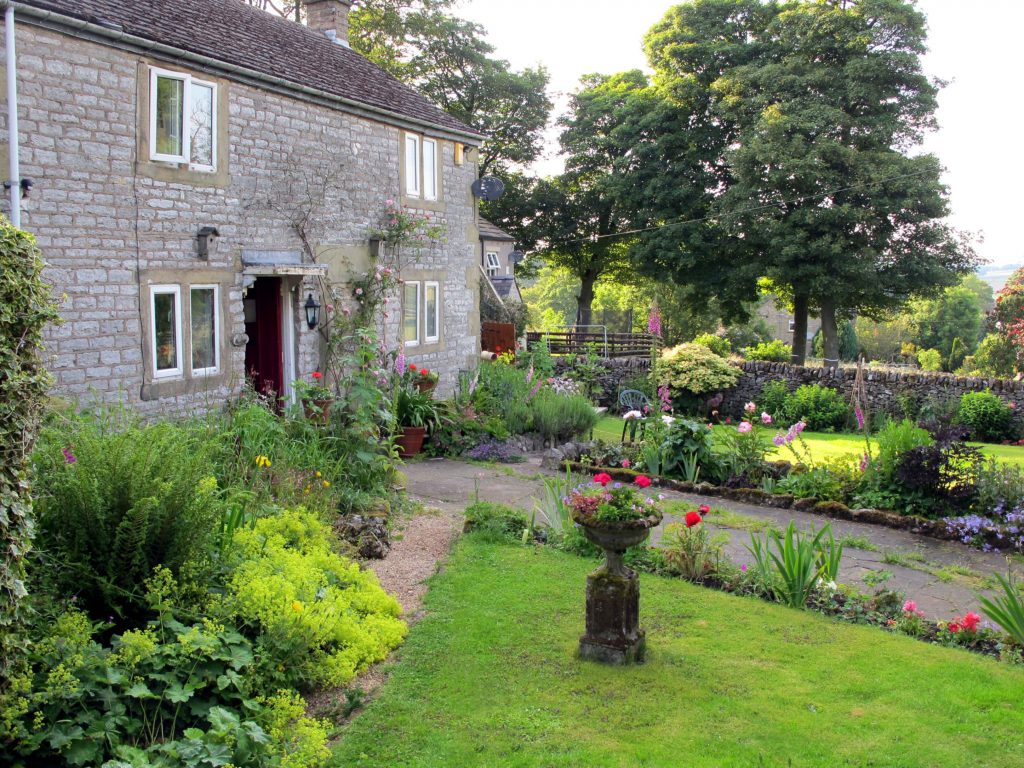
The front Lower Lawn was doubled in size, levelled by hand and set to seed. The big back lawn was laid with turf.
.
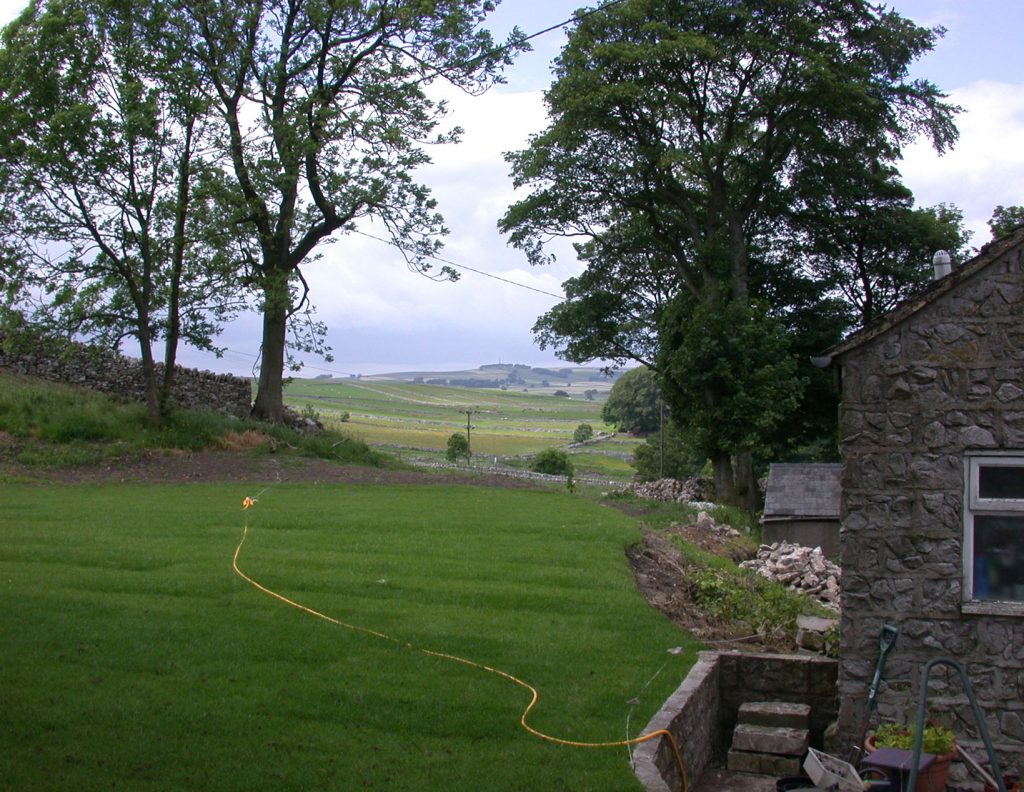
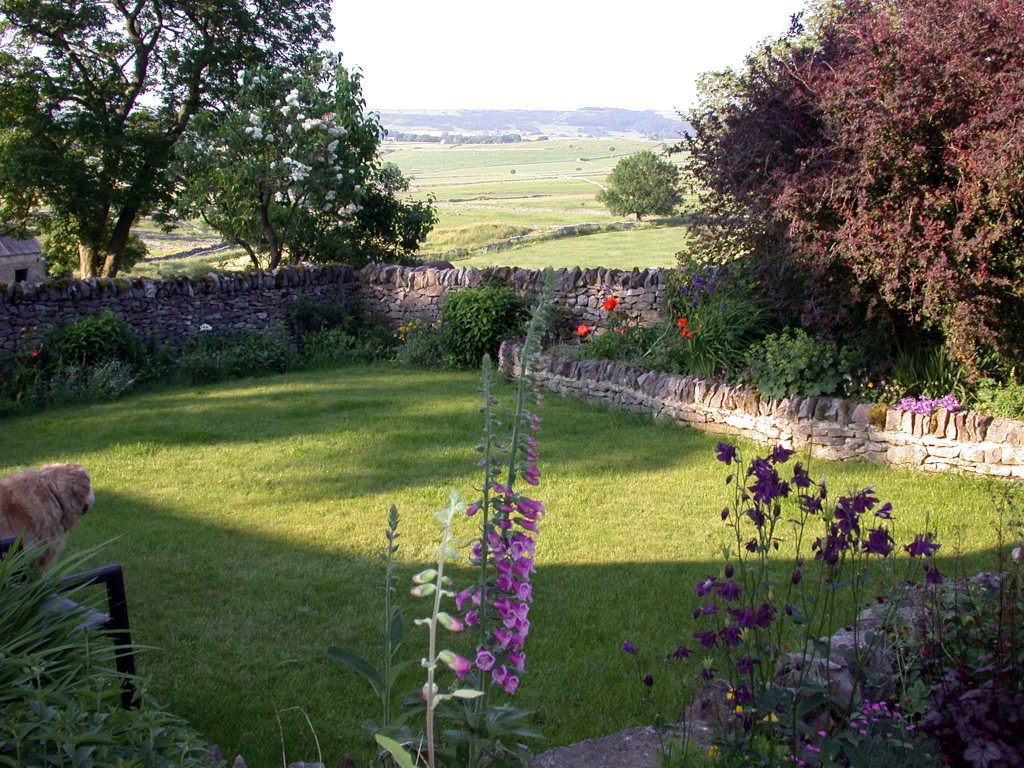
In mid-summer, the sun sets between the two clumps of trees on the far horizon, just to the right of the Ash tree, making this a lovely place to sit on summer evenings.
If you imagine the dry stone wall that slopes down, to right of picture, continuing right across to the corner of the building on the left, the small area to the far side of that wall was all the original back garden there was; all in the deep shade of the big old Sycamore.
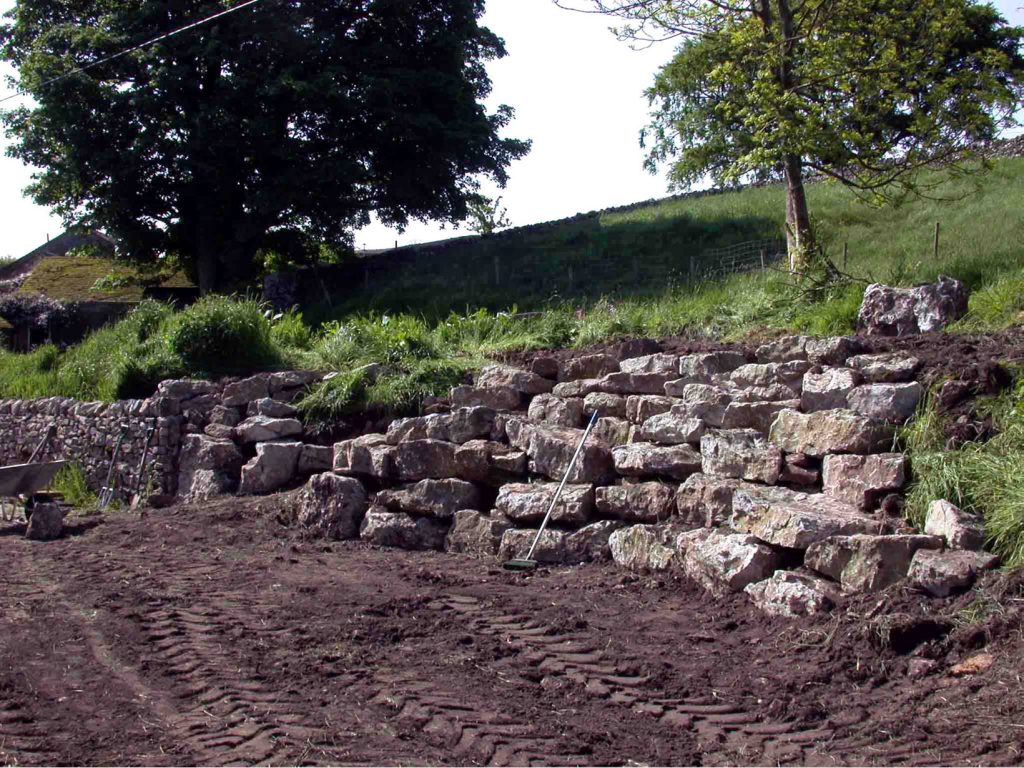
The wall ends prematurely because we were uncertain of the best way to create steps up to the lawn. The rocks in foreground were, later, used to support the edge of the lawn. The retaining wall needed to be built to a little more than a metre high and the level of the intended lawn was, in places, another metre above that, leaving a steeply sloping “bed area” to be resolved. Once the lawn was laid to turf it became clear that some form of support would be necessary to prevent its lower edge slipping downwards, so we utilised some of the larger pieces of limestone, laid on end, which both supported the lawn and allowed the “bed area” to be levelled. The earth in this proposed flower bed was very poor; mainly subsoil, rocks & clay. It was some time before the envisaged rose bed would become a reality but, meanwhile, the empty space was a useful place to empty the mower’s grass box and the fallen Sycamore & Ash leaves, thus building up a layer of what could more reasonably be described as soil, thanks to the activity of earthworms.
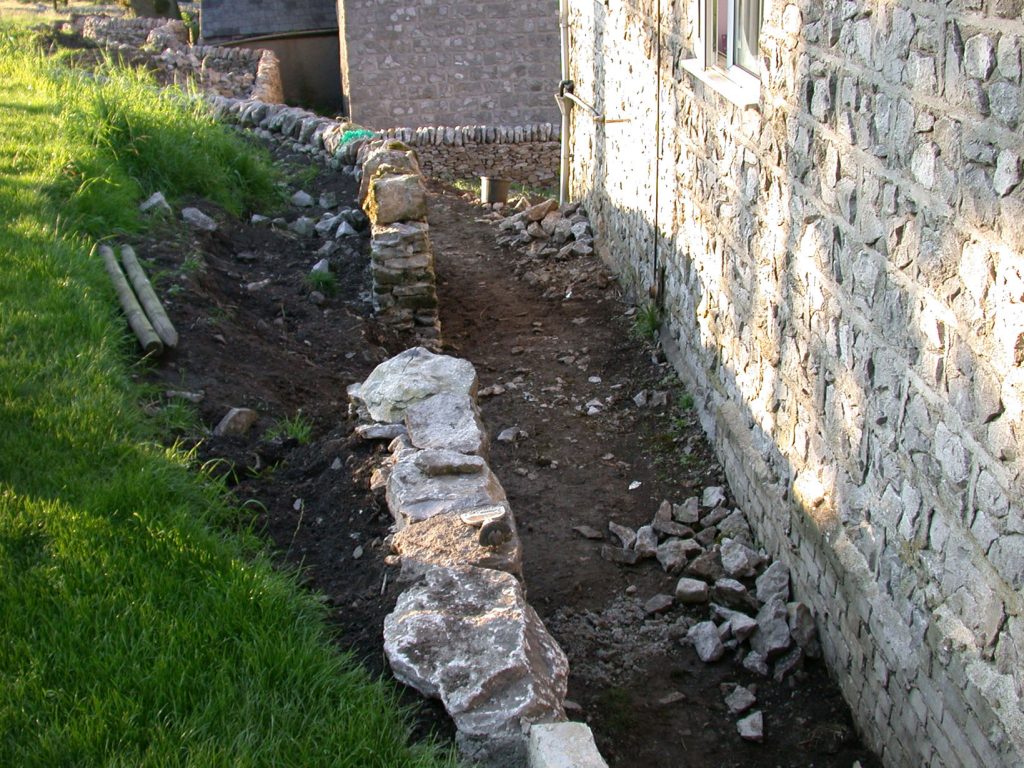
Note the depth. The black plastic pipes were to be cut into metre lengths and placed vertically at pre-determined intervals along the bank side of the wall prior to infilling; a wrought iron railing was being forged, the uprights of which would be set into the pipes, then filled with concrete; a precautionary procedure, as ramming fence posts tight up against a dry stone wall can destabilise the structure.
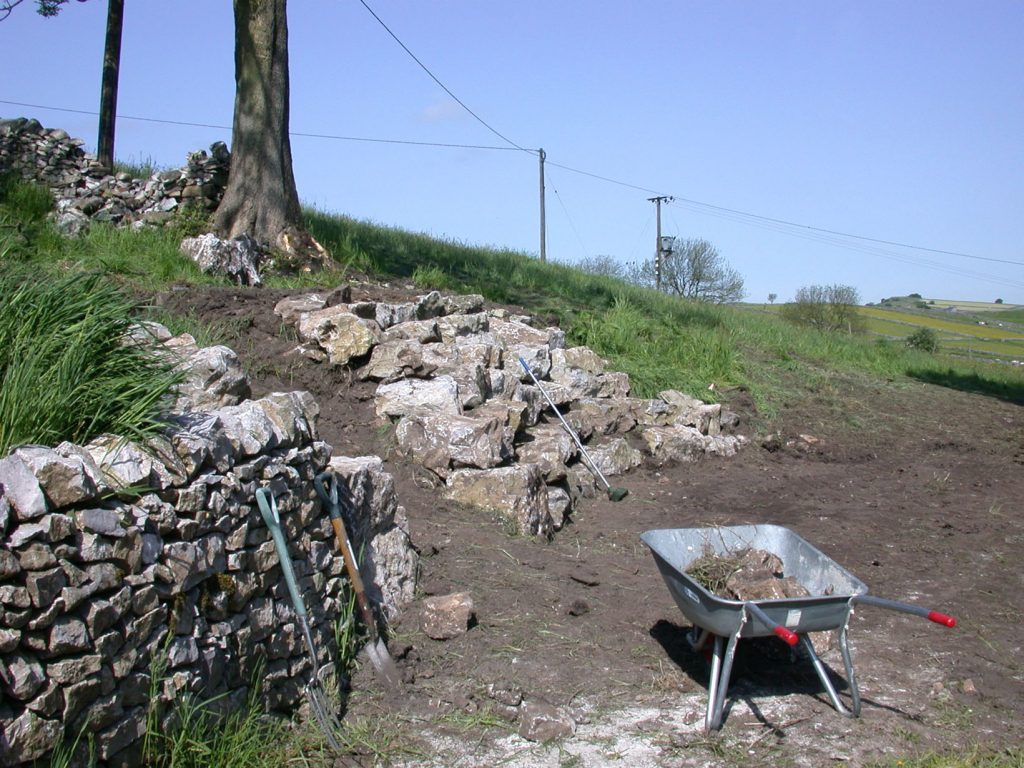
For those interested in garden tools: both the fork and the spade have had to be replaced over the intervening years, but I still use the same rake (already at least a dozen years old when this photo was taken) and the same trusty wheelbarrow, although it has had several replacement inner tubes and wheels during its lifetime.
Whilst the major excavations at the back of the house were in progress, I was busily trying to make sense of the newly extended lower front garden, which posed its own problem of levels. Upon demolishing the original boundary wall, and dismantling an ugly shed that had been only partly hidden from our view by the dry stone wall, the disparity in levels between the two plots was all too evident. The newly gained ground was a good metre and a half lower than our existing garden. Not only would the new boundary wall have to be strongly built as a retaining wall, but a great deal of soil would have to be moved from one level to the other….. by hand as there was no access for even the smallest digging machinery. There was also a troublesome tree stump to remove (well three actually because there had been a multi-stemmed Rowan growing against the old boundary wall). As this had also been next to the site of the old coal bunker, as well as chopping and digging out, we resorted to using up some of the scattered coal debris and set a fire burning in the centre of the multi-stump. It took a few days, but we eventually succeeded in getting rid of the stump.
In taking off the soil from the drive side of the garden, to transfer it to the lower side, we hit a point where the rock wouldn’t allow us to go any lower; this meant that the Lower Lawn would have to be built on a slight slope because, had we built up the lower ground to make it level, we would have to increase the height of the boundary walls, one of which was already over a metre and a half high on next door’s side and, therefore, just not feasible.
A small retaining wall had also to be built to support the existing shrubbery bed and the flower bed between the proposed lawn and the lower driveway. This proposed flower bed was the site of one of my worst gardening errors of judgement: once the wall was built, I was left with a deep trench to fill. I had a certain amount of garden compost but nothing like sufficient. My neighbour had copious quantities of Beech leaves to get rid of, so I first filled the bottom of the trench with those, then my garden compost; all’s well so far, but the trench was not yet half filled. A family friend ran a small nursery business with a council contract to provide and service tubs and hanging baskets in the local town; he offered me a lorry-load of spent hanging baskets to fill my trough (complete with lots of spent plant matter to top-up my now empty compost bins). Trench duly filled and successfully planted up, what I hadn’t factored-in was the amount of sphagnum moss I was adding to the garden. The Little lawn had previously been plagued by moss, due to the combination of clay soil and deep shade for much of the day. And some of the old dry stone walls were also capped in moss so the last thing I should be doing is introducing yet more moss. Now, if I leave my front beds alone for any length of time, the moss takes over. I could furnish the entire county’s supply of hanging baskets with the sphagnum moss from my garden.
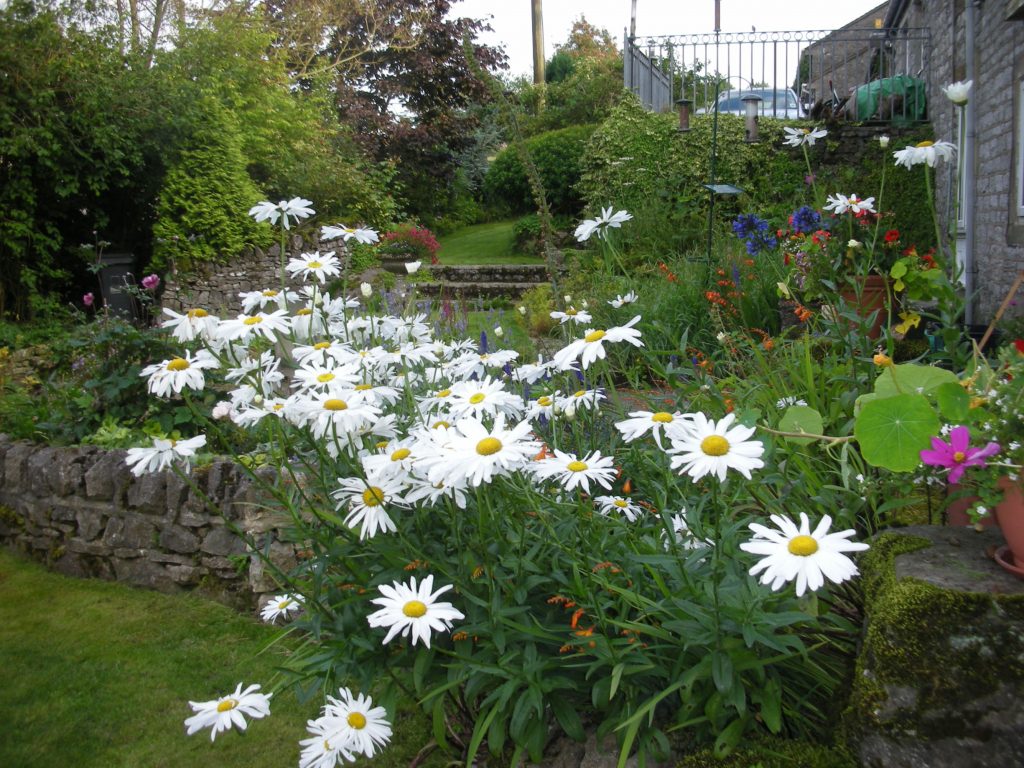
The lawn is about eighteen inches lower than the paving on the left.
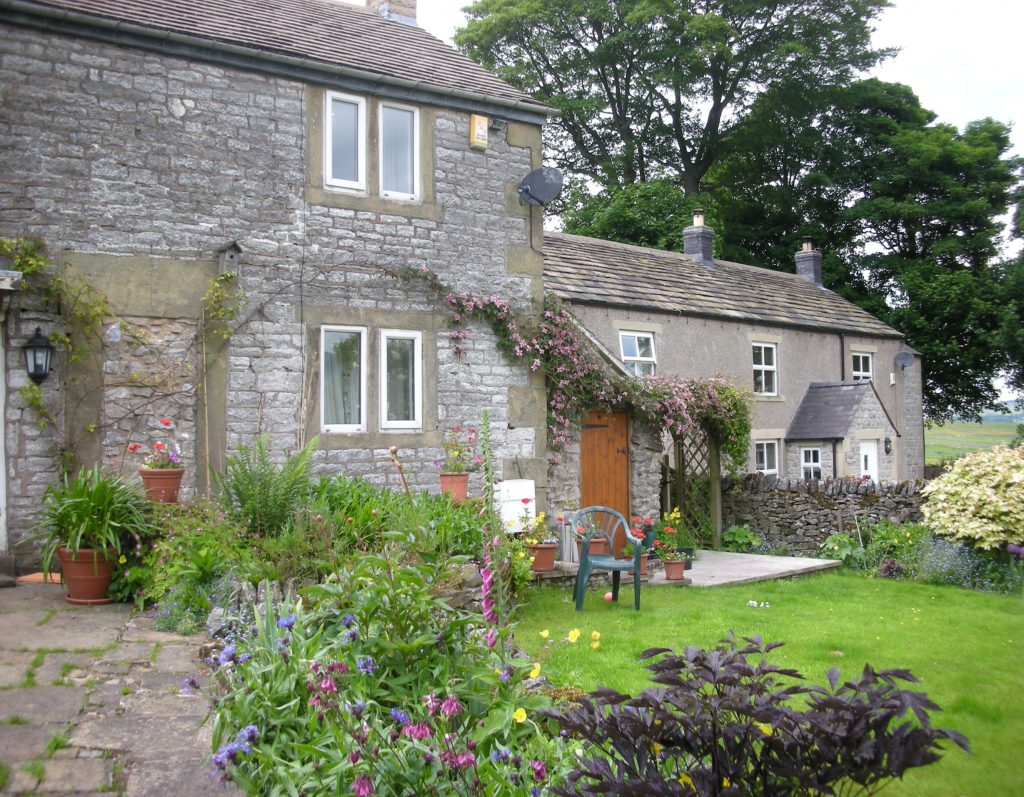
Hidden by the chair are some shallow steps, necessary to traverse the change in levels. Clearly visible is the stone outline of the original front door to what would have been one of two small, semi-detached cottages.
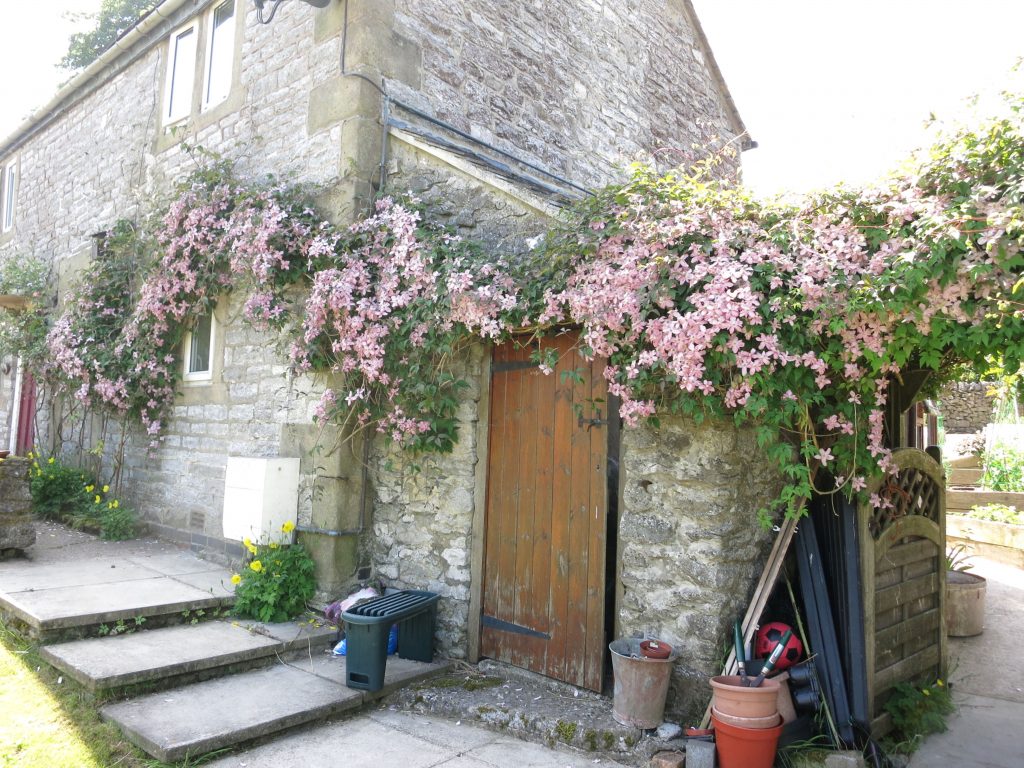
The shed, which is bedecked in Clematis Montana, used to belong to next door, and the sandstone cornerstones show where the original boundary of our land was. Having Grandchildren and a dog, it was necessary to create a gateway between the front and the back gardens for their security. To make a feature out of this necessity, and also to create some sense of privacy from next door’s overlooking windows, we installed an arch, duly planted with Clematis Montana on one side, and a Clematis Alpina on the other, together with a rose Gertrude Jekyll which has never really been very happy there, trapped between a drystone wall and pavings.
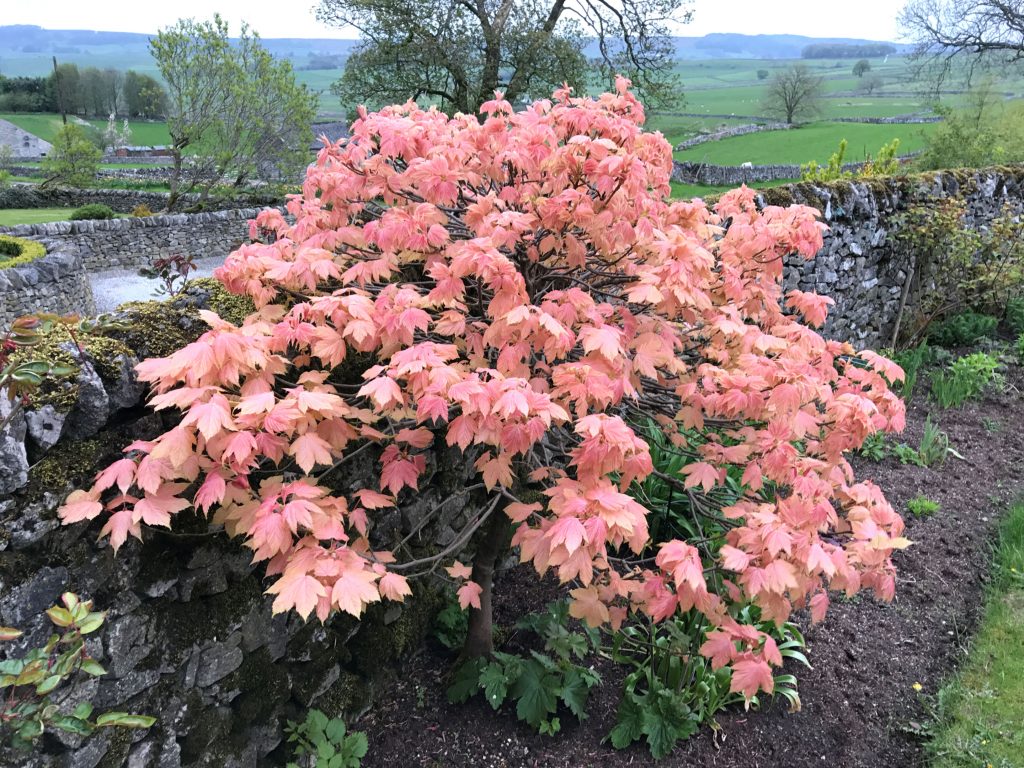
On the right of the picture is an Acer Brilliantisima in its Summer clothing. This is one of my most treasured plantings; it is an absolute delight throughout Spring and early Summer, when its foliage changes from pink to a variegated apple green.

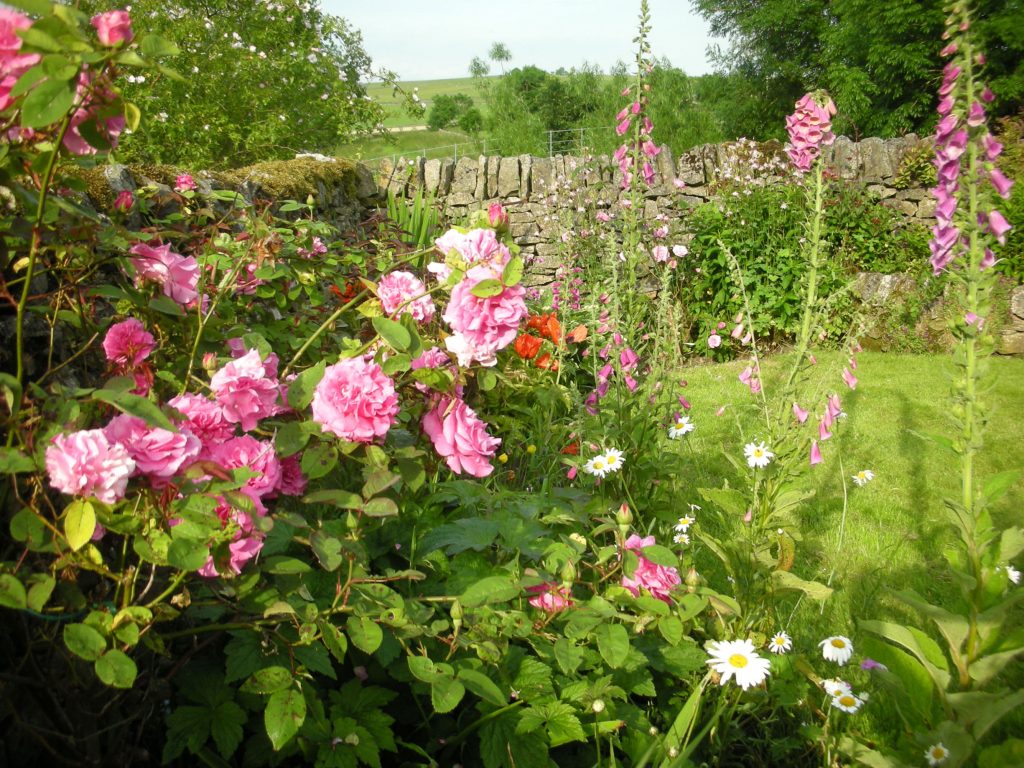
I try to use a planting style that is sympathetic to, and inclusive of, the surrounding landscape.
continued on Page 3